
- Category
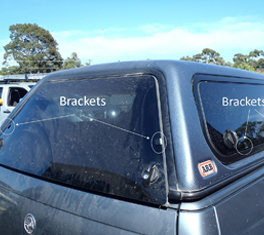
Bracket Locations

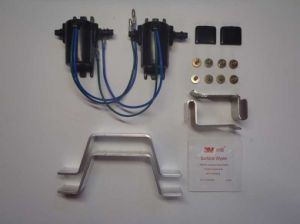
Rear & Side Actuators
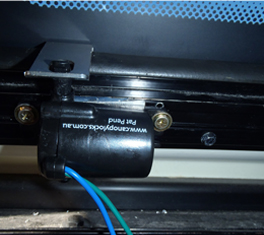
Side Window Actuator with Spacer
Side Window Actuator
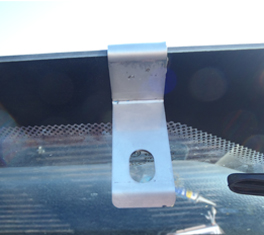
Side Window Bracket
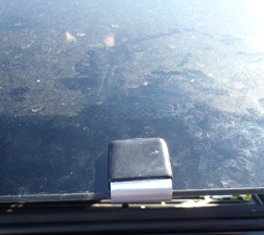
Cap over end of bracket
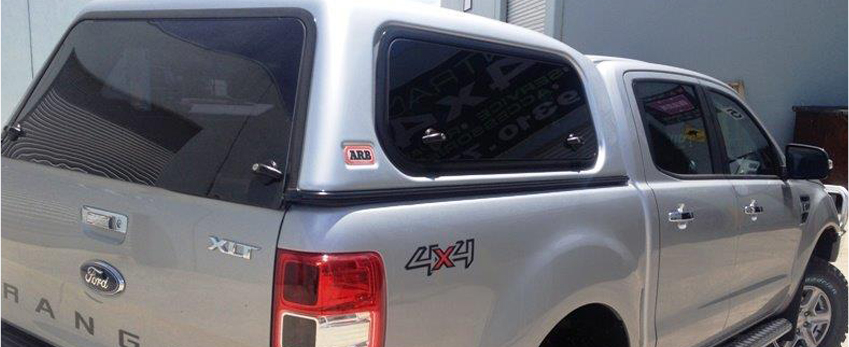
Central Locking System Suitable for ARB Canopies
- The locking kit is currently available to suit the range of ARB Classic Canopies with frameless glass windows.
- There are different configurations of the kit available, for 1, 2, or 3 windows and with or without a separate remote control. All these kits are available in our online shop.
- The locking kits can be connected to the central locking of the vehicle, this may require the installation of 2 relays, these relays are not supplied as part of the kit and have to be supplied by the installer. It is recommended that an auto electrician install this option.
- Each kit comes with an installation guide and the kits supplied with a remote control also come with a wiring diagram.
ARB Classic Canopy
-
 ARB Kit 1Special Price $AU 399.60 Regular Price $AU 444.00Remote Central Locking Kit to suit ARB Classic Canopy with 3 Lift up windows including, Remote Control & Protection Bracket Kit. Learn More
 -
 ARB Kit 2Special Price $AU 325.80 Regular Price $AU 362.00Central Locking Kit to suit ARB Classic Canopy with 3 Lift up windows including Protection Bracket Kit, No Remote Control Learn More
 -
 ARB Kit 3Special Price $AU 296.10 Regular Price $AU 329.00Remote Central Locking Kit to suit ARB Classic Canopy with 2 lift up windows including Remote Control & Protection Bracket Kit Learn More
 -
 ARB Kit 4Special Price $AU 222.30 Regular Price $AU 247.00Central Locking Kit to suit ARB Classic & Classic + Canopies with 2 lift up windows including Protection Bracket Kit, No Remote Controller, 2 windows can be 1 side & rear window or 2 side windows. Learn More
 -
 ARB Kit 5Special Price $AU 191.70 Regular Price $AU 213.00Remote Central Locking Kit to suit ARB Classic Canopy Rear window including Remote Control & Protection Brackets Learn More
 -
 ARB Kit 6Special Price $AU 117.90 Regular Price $AU 131.00Central Locking Kit to suit ARB Classic & Classic + Canopies rear or 1 side window including Protection Brackets, No Remote Controller Learn More
ARB Canopy Installation Guide
ARB Kit 1
Remote Central Locking Kit to suit ARB Classic Canopy with 3 lift up windows including Remote Control
& Protection Bracket Kit
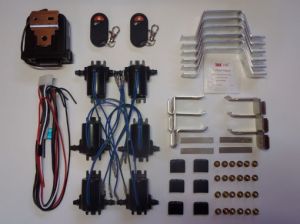
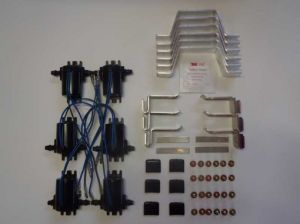
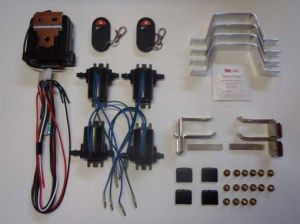
Check contents of package which consists of
- 6 Actuators
- 6 Window Brackets
- 4 spacers
- 1 control box and mounting bracket
- 2 remotes
- 1 wire loom with plug to controller
- 12 8g x 12 self drill screws
- 6 black caps
- VHB surface wipe
- PB1 Protection Bracket Kit
Suggested materials you may need
- 5mm automotive wire 15 amp
- 10mm loom tube
- 3mm automotive wire 10 amp
- Silicone
- Crimp tool for red insulated terminals
- Female red bullet connectors
- Stick on mounts
- Cable ties
Installation:(Note if you are unsure of these steps please refer to the picture gallery at www.canopylocks.com.au - most steps are shown)
- Open side window. Select location for window bracket (close to handle but leave enough room so as not to interfere with movement of the handle, and making allowance for protection bracket to be installed) Use VHB wipe to clean window where bracket is to be fitted. (it is recommended to mark the positions of all the brackets and then clean all positions so wipe does not dry out)Then peel plastic from double sided tape on bracket and slide bracket over bottom of window (without the tape touching the window). When the bottom of the bracket is touching the window, push double sided tape onto the window to secure bracket. Push one of the black plastic caps over the outside end of the bracket.
- Where window bracket is now installed place the actuator on the inside of the window frame with the pin extended upwards and line up the pin to the centre of the hole in the bracket and the shoulder on the pin to the underside of the bracket. Now push the pin of the actuator fully down to make sure top of pin clears the bracket so window can be opened. Secure the actuator to the window frame using 2 of the 8g x 12 screws. Next loosen off the actuator screws so spacer can be placed in between the actuator and the window frame, (side windows only) use a small amount of silicone to keep spacer in place then retighten screws so actuator is firmly secured to window frame. The hole in the bracket may need to be enlarged to ensure that the pin moves freely with the window handle in the open or closed position, this can be done by using a file to make the hole larger. The bracket can also be bent up or down to ensure actuator pin engages with the bracket when locked and clears the bracket when unlocked
- Repeat steps 1 & 2 for all 5 other locking positions (next to handles). Note: If the actuator for rear window is mounted partly on the strut bracket a spacer should be placed under the actuator of the same thickness of the strut bracket. This spacer is not supplied with the kit.
- Mount controller anywhere in cabin (this is important for ease of accessibility in the event of unforseen failure). Now referring to wiring diagram supplied, run a 15 amp cable to the controller from a positive power source. Connect the black wire to a negative. Then run 2 wires (3mm 10amp) from the controller white & white black to the first actuator and then loop wires to all other actuators, using loom tube and stick on mounts to secure wiring inside canopy. Connect all actuators to cabling using female bullet connectors and then connect power to controller.
- Operate remote controller and make sure all actuator pins travel in the same direction at the same time and when the lock button is pressed all pins are in the locked position. If the pins are not travelling in the same direction, then reverse the connections at the actuators travelling in the wrong direction.
-
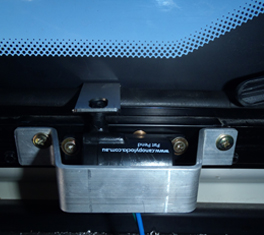
PROTECTION BRACKETS
Hold a protection bracket over the top of an actuator and mark the position for holes to be drilled through the bracket. Drill one hole at each end of the bracket with a 4.5mm drill, then screw the bracket onto the window frame using the 2 8g x 12 screws supplied making sure that the protection bracket does not interfere with the movement of the handle. Repeat for all actuators